Saturday, December 25, 2010

The best way to spread holiday cheer is by singing loud, for all to hear.

Or baking. That works too.
Or, better yet, doing both simultaneously.

Maybe you have figured out that I am watching Elf, the greatest holiday movie ever made. Will Ferrell is my life. Good grief.


Since last night was Christmas Eve, my friends (more like cousins, really) came over for our big dinner, and so I made cupcakes. I cannot believe how long it has been since I have made cupcakes.
Since it is a special day, I used Magnolia Bakery's Chocolate Cupcake recipe. If I had my way, I would eat Magnolia Bakery cupcakes all day everyday. But I live in California, so that is a bit of a challenge. Oh well.

To make them, I did this:

Magnolia's Chocolate Cupcakes:

2 cups all-purpose flour
1 teaspoon baking soda
1 cup (2 sticks) unsalted butter, softened
1 cup granulated sugar
1 cup firmly packed light brown sugar
4 large eggs, at room temperature
6 ounces unsweetened chocolate, melted (see Note)
1 cup buttermilk
1 teaspoon vanilla extract


1. Preheat oven to 350 degrees.

2. Line two 12-cup muffin tins with cupcake papers. Set aside.

3. In a small bowl, sift together the flour and baking soda. Set aside.

4. In a large bowl, on the medium speed of an electric mixer, cream the butter until smooth. Add the sugars and beat until fluffy, about 3 minutes. Add the eggs, one at a time, beating well after each addition. Add the chocolate, mixing until well incorporated. Add the dry ingredients in three parts, alternating with the buttermilk and vanilla. With each addition, beat until the ingredients are incorporated, but do not overbeat. Using a rubber spatula, scrape down the batter in the bowl to make sure the ingredients are well blended and the batter is smooth. Carefully spoon the batter into the cupcake liners, filling them about three-quarters full. Bake for 20–25 minutes, or until a cake tester inserted in the center of the cupcake comes out clean.

5. Cool the cupcakes in the tins for 15 minutes. Remove from the tins and cool completely on a wire rack before icing. At the bakery we ice the cupcakes with either Vanilla Buttercream or Chocolate Buttercream.


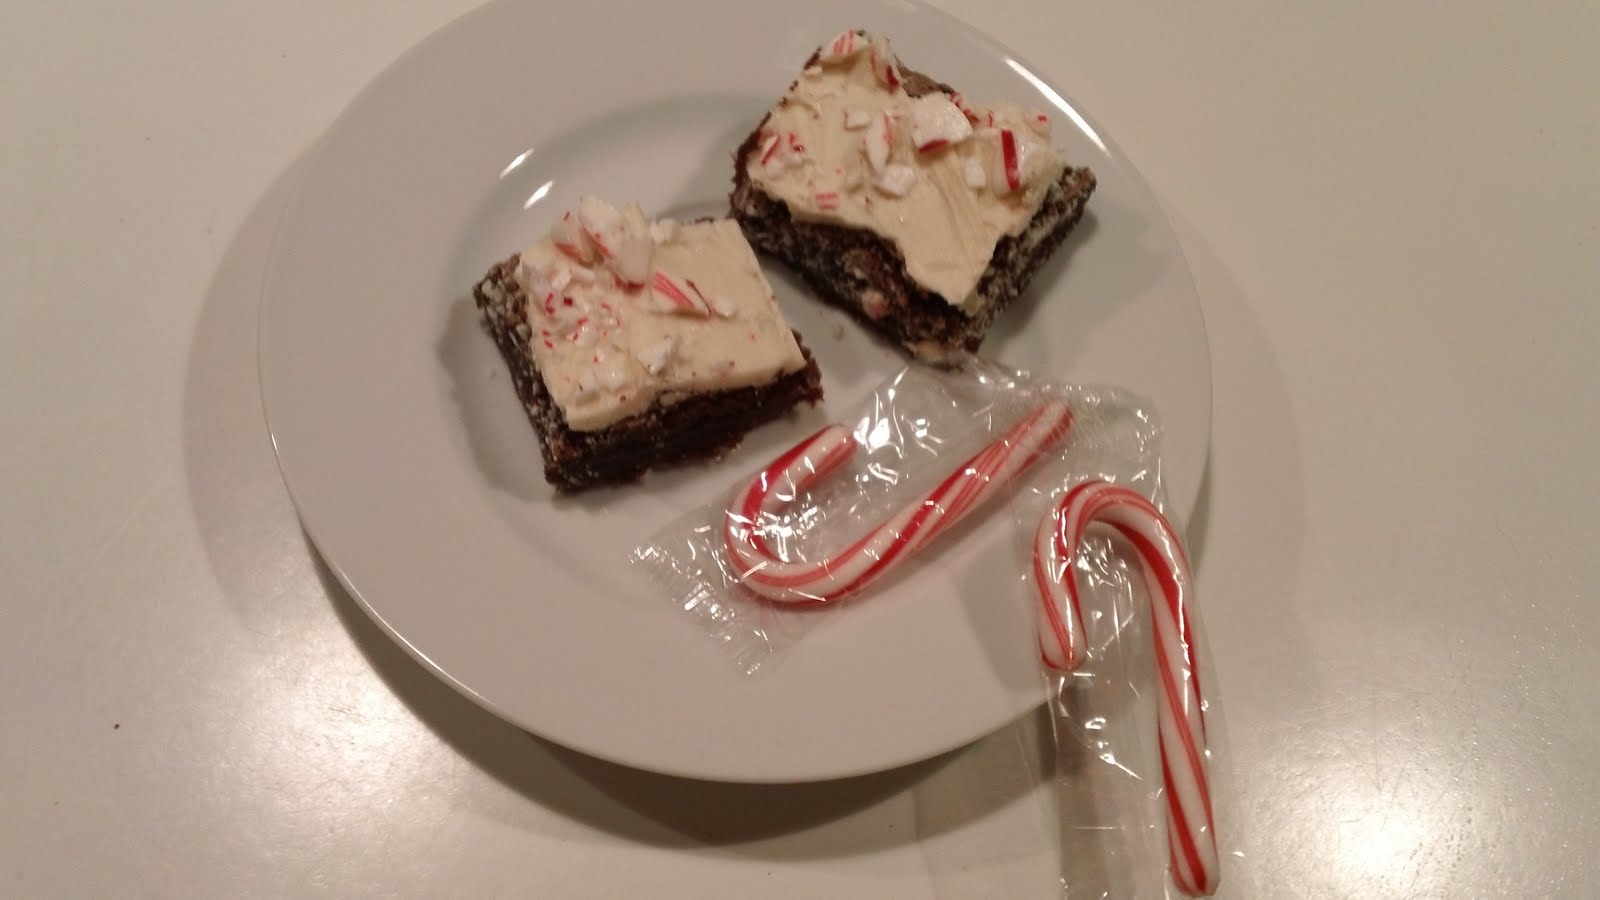
Instead of doing a chocolate buttercream though, I chose to frost half of the cupcakes with a vanilla buttercream rolled shredded coconut, and the other half with a peppermint buttercream sprinkled with crushed candy canes. I used the Magnolia buttercream recipe, to go with the whole theme of the cupcakes haha.

Magnolia's Vanilla Buttercream Frosting*

1 cup (2 sticks) unsalted butter, softened
6 to 8 cups confectioners’ sugar
1/2 cup milk
2 teaspoons vanilla extract

Place the butter in a large mixing bowl. Add 4 cups of the sugar and then the milk and vanilla. On the medium speed of an electric mixer, beat until smooth and creamy, about 3-5 minutes. Gradually add the remaining sugar, 1 cup at a time, beating well after each addition (about 2 minutes), until the icing is thick enough to be of good spreading consistency. You may not need to add all of the sugar. If desired, add a few drops of food coloring and mix thoroughly. (Use and store the icing at room temperature because icing will set if chilled.)


*For half of the frosting I added 1/2 tsp of peppermint extract and about 2 drops of red food coloring (for a kind of pink candy cane kind of look).


These ones I just frosted with the vanilla buttercream, then rolled in shredded coconut. I think they look, I don't know, 'snowy', or something.

They were definitely a hit. The peppermint ones got a lot more love than the coconut ones, but in my humble opinion I personally thought the coconut ones were more appealing. Oh well, more for me I guess.

Peace. Love. Cupcakes.

Thursday, December 23, 2010

Now THOSE are some special brownies....

So, remember how I said that I would post about my special brownies later? Well, wait no more, they're here!
Introducing, my spectacular Peppermint Bark Brownies.
Now, I am quite aware of the fact that I am probably not the first or the only person in the world to think of making peppermint bark in the form of brownies, but nonetheless, I am still super proud of myself for coming up with these, and they have received much praise over the years.
I thought of the concept freshman year, and ever since it has been a must-make of the holiday season.

I just use the same basic One Bowl Brownies recipe, but of course, they are very embellished.

Then crush 4-5 regular size candy canes and put them in a bowl.


Once the brownies have cooled for about 10-20 minutes, melt an 11 oz. bag of white chocolate chips by putting them in a heat proof bowl on top of simmering water (and stirring constantly until melted completely). Then, pour the melted chocolate on top of brownies (which have not been cut yet) and smooth out with a spatula until a smooth thin layer covers the entire thing. Sprinkle crushed candy canes generously all over white chocolate, and then place the entire thing in the fridge and chill until chocolate has hardened, about 20 minutes.


Cut them carefully, trying not to crack the white chocolate layer.

I like them a lot, but honestly, I think it is just me, but they are too sweet. I can only have a small one once in a while because I just can't really have that much sweet in one dessert.
Other people who have had these generally tend to disagree, which is fine with me, I love making them and people love eating them. And that's what its all about.


Peace. Love. SPECIAL Brownies.

Modest Mouse Cookies

Yet another recipe from the Martha Stewart Holiday Cookies magazine.
This time: mouse cookies.
Oh my stars they are the absolute cutest things in the entire world and they are actually pretty yummy. I made them for the Nutcracker cast party last night, and all of my friends loved them. Reid took forever to eat hers because she was too scared to mess it up.
They were actually pretty easy to make, but I think next time I make them they will come out better because I was kind of experimenting with techniques and stuff.


^ Marissa enjoying one of the mousie cookies.


^ Ella eating one of the cookies. You can't really see the cookie itself but gosh I love this girl, so I just had to put this picture up.

Mouse Cookies:
3 cups all-purpose flour
1/2 tsp. salt
2 sticks butter
3/4 cup sugar
1 tsp almond extract
1 large eggs
1/4 cup sliced natural almonds
licorice rope
3 ounces semisweet chocolate, coarsely chopped*

* I just used chocolate chips and they worked fine.


1. Whisk to combine flour and salt in a bowl. In a separate bowl, beat butter with an electric mixer on medium high speed until creamy, about 2 minutes. Add sugar gradually, beating until mixture is pale and fluffy, about 3 minutes. beat in extract, then egg. Reduce speed to low, and add one-third flour mixture. Gradually add remaining flour mixture, beating just until blended. Halve dough and shape into disks; wrap each in plastic, and chill 2 hours or up to 1 day.

2. Preheat oven to 350 degrees. Roll about 1 tablespoon of chilled dough between your palms to form 1 1/4 to 1 1/2 inch-long oval shapes. Slightly elongate one side to form face. Gently pinch bridge of nose to form eye sockets. With a pairing knife, make 2 small slits at top of each shape, for placement of ears. Place 2 sliced almonds into slits. Place shapes on parchment-lined baking sheets, spacing 2 inches apart.

3. Bake, rotating sheets halfway through, until cookies are light golden brown on bottom and around edges, and tips of ears are golden brown, about 20 minutes. Transfer sheets to wire racks, and immediately insert a wooden skewer* about 1/2 inch into mouse's round end. Remove skewer and insert curved length of licorice for tail. It should adhere to the still-warm cookie. Let cookies cool completely on wire racks.

4. Melt chocolate in a heatproof bowl set over (not in) a pan of simmering water. Turn off heat; keep chocolate warm until ready to use, stirring occasionally. Place melted chocolate in a parchment cone or resealable plastic bag with a tiny hole cut in one corner. Pipe chocolate in tiny dots to form eyes and nose. Chill until chocolate is set, about 20 minutes. Cookies can be stored in a single layer in an airtight container at room temperature up to one week.

*I found that using a chopstick worked better to get the licorice to fit.


I loved them. My friends loved them. Everyone loved them. I think it is safe to say that this is going on my top ten favorite things I've baked, and these might have to turn into a new holiday tradition.

Peace. Love. Mice.

Short and sweet.

I made shortbread. That's about all there really is to say. The recipe is from, of course, Martha Stewart. As I said, I will be/am been using a lot if her recipes during this season, but I promise that when the holidays are over I will go back to mixing things up.
Anyway, here is the recipe.

Classic Shortbread:
2 cups all-purpose flour
1 1/4 tsp. coarse salt
2 sticks butter, softened, plus more for pan
3/4 cup confectioners' sugar

1. Preheat oven to 300 degrees, with rack in upper third. Whisk to combine flour and salt in a bowl.

2. In a seperate bowl, beat butter with an electric mixer on medium high speed until fluffy, about 3 minutes, scraping down side of bowl as necessary. Gradually add confectioners' sugar; beat until pale and fluffy, about 2 minutes. Reduce speed to low. Add flour mixture all at once; mix just until combined.

3. Butter an 11 1/2 by 8 1/2 inch rimmed baking sheet, and line with parchment, leaving a 2 inch overhand on long sides. Butter parchment. Using plastic wrap, press dough onto sheet. Leave plastic on dough, and chill 20 minutes. Score in 32 rectangles (each about 3 by 1 inches); pierce dough all over with a wooden skewer. Chill 30 minutes. Bake until golden brown and firm in center., about 40 minutes. Transfer cookies, on parchment, to a wire rack; let cool slightly. Cut along scored lines into fingers, and let cool completely.


They were so yummy. This is my favorite shortbread recipe I have tried so far. The magazine had some variations on it like walnut fingers, lemon shortbread and brown sugar wedges, all of which I think I will be trying in the near future.
I made these 2 days ago and they are already gone (not all me, my family contributed to eating most of them). I think these were definitely a success.

Peace. Love. Shortbread.

Monday, December 20, 2010

Ginger family

Bahahaha. I saw this box of cookies at Safeway the other day.


Not the best choice of words, I must say, but I certainly found it pretty freakin hilarious.
Anyway, I am not the biggest fan of gingerbread cookies, but I thought I would give Martha Stewart's gingerbread recipe. I really feel like I should be doing a "Julie and Julia" with me and Martha Stewart's holiday recipes, since that is the main source of my recipes for this season (I bought her holiday cookie magazine a few weeks ago and her holiday desserts one last year). But I am making other recipes too, and I'm only making a selection of the Martha recipes.
Anyhow....I made these gingerbread men for my friends in the Youth Company on friday since it was Nutcracker time and I figured we could use some holiday treats. I actually liked the way they tasted better than any other gingerbread cookie recipes I've tried in the past.

Here's the recipe:

1 cup softened butter
1 cup packed brown sugar
1 large egg
1/2 cup unsulfured molasses
2 1/4 tsp. ground cinnamon
2 tsp. ground cinnamon
1 tsp. ground allspice
1 tsp. baking soda
1/4 tsp. salt
4 cups all-purpose flour (plus some for work surface)


1. Beat butter and brown sugar with an electric mixer on medium high speed until fluffy, 3 to 4 minutes. Add egg; mix well. Beat in molasses, cinnamon, ginger, allspice, baking soda, and salt. Reduce speed to low, and add flour, 1 cup at a time, mixing just until incorporated. Divide dough into quarters; shape into disks. Wrap each well in plastic; chill 3 hours or up to 1 day.

2. Preheat oven to 375 degrees. On a lightly floured work surface, roll out 1 disk of dough to 1/8-inch thickness. Cut out shapes using gingerbread people cutters and place on parchment-lined baking sheets, spacing 1 inch apart. Repeat with remaining dough.

3. Bake, 2 sheets at a time, rotating halfway through, until cookies are firm to touch, 12 to 15 minutes. Let cool on sheets 5 minutes, then transfer cookies on a wire rack to cool completely. Ice and sugar as desired.


As I said, I actually enjoyed them, which is unusual for me since I don't really like gingerbread. The whole process was quite a production though, and I am happy that they are a once-a-year kind of thing.

Peace. Love. Gingerpeople.

Tuesday, December 14, 2010

Are those "special" brownies?

To put it simply, no.
That's the problem with bringing brownies in to school. That is always the first question people ask me. No, of course I didn't put weed in them. Why would you think I would be stupid enough to bring weed brownies to school? Come on guys, give me a little credit here.
Also, i save my special brownies (which are not made with cannibutter or anything to do with that!) for later on this month, because they defined are a must for the holidays. But as for today, I just made the simplest brownies possible. No nuts, no chocolate chunks or chips, no nothin. Just pure, wonderful brownies.
Sounds boring? Maybe. But they have been very popular in the past.
I love brownies. I feel like they are sweet and rich enough as is. Just chocolate and a little bit of powdered sugar and that's it.

Wow, I realize I'm not making these sound very great, but trust me, they're the bomb dot com.

BAKER'S ONE BOWL Brownies:

2 Ounces Unsweetened Chocolate
3/4 cup butter or margarine
2 cups sugar
3 eggs
1 tsp. vanilla
1 cup flour


1. Heat oven to 350°F.
2. Line 13x9-inch pan with foil, with ends of foil extending over sides. Spray foil with cooking spray.
3. Microwave chocolate and butter in large microwaveable bowl on HIGH 2 min. or until butter is melted. Stir until chocolate is completely melted. Stir in sugar. Blend in eggs and vanilla. Add flour ; mix well. Pour into prepared pan.
4. BAKE 30 to 35 min. or until toothpick inserted in center comes out with fudgy crumbs. (Do not overbake.) Cool completely. Use foil handles to remove brownies from pan before cutting to serve.

Peace. Love. Browniesss

Monday, December 13, 2010

Lend me some suga, I am your neighbor!

At long last I am back!
my deepest apologies for not updating in MONTHS. I've been busy/sick/lazy. But it wouldn't be December without massive amounts of baking. So here I am, back in action, and I won't put any of you (especially Kaytay...)through the stress of not updating again. Hahaha.

Anyway, I started out the holiday baking season with an old annual tradition: sugar cookies.
I used the Deluxe Sugar Cookie recipe from the Betty Crocker cookbook. They are the absolute best sugar cookies ever. I love them and use this recipe all the freakin' time. Yummmmmm.

Anyway, here ya go:

HOLIDAY SUGAR COOKIES:

1 Cup butter
1 1/2 Cups confectioners' sugar
1 egg
1 Tsp. vanilla
1/2 Tsp. almond extract
2 1/2 Cups all-purpose flour
1 Tsp baking soda
1 Tsp. cream of tartar


(ahaha, okay, I know elephants aren't very Christmas-y, but I couldn't resist)


1. Mix butter, confectioners' sugar, egg, vanilla, and almond extract thouroughly.
2. Blend in flour, soda and cream of tartar.
3. Cover; chill 2-3 hours.
4. Heat oven to 375 degrees. Divide dough in half.
5. Roll each half out on a lightly floured surface. Cut into desired shapes; sprinkle with decorative sugar.
6. Place on cookie sheets with parchment paper. Bake 7 to 8 minutes, or until light brown on edge. Makes about 5 dozen cookies.

I'm bringing these in to my friends at school tomorrow, but I know this is not going to be the only time this month that I make these cookies. I think that they are actually my favorite thing that I bake during the holidays. Or any time of year, actually.


Peace. Love. Sugar.

Sunday, September 26, 2010

Okay so I basically fail at life and haven't updated in foreverrrrrr....so get ready for an explosion of posts.

Thursday, August 26, 2010

breakfast in the form of cookies

So I've been feeling really stressed and blahhhh this week, so I have been really feeling the need to bake something. I decided to make shortbread, and jeez, that is like the easiest thing to make and one of the most delicious. Haha.
I could have left them plain and they would have been absolutely delicioussssss, BUT, i decided to be a little more fancy shmancy and made them into sandwiches.
I filled half of them with my mom's home made strawberry jam (which is the best jam EVER, just saying), and the other half with Nutella. (Both of which are reoccurring stars of my breakfast, usually appearing on my toast.)
I got the recipe for the cookies from Cupcake Rehab, which is actually one of my favorite baking blogs. Like I said before, they were so good even just plain, they had the perfect amount of salt and weren't too sweet. Yummmmmm. Anyway, here's the recipe.

SHORTBREAD COOKIES:
2 cups all-purpose flour
¼ teaspoon salt
1 cup (2 sticks) unsalted butter, room temperature
¼ cup powdered (confectioners or icing) sugar
¼ cup granulated sugar
1 teaspoon pure vanilla extract


1. In a separate bowl whisk the flour with the salt. Set aside.
2. In the bowl of your electric mixer (or with a hand mixer), cream the butter until smooth (about 1 minute). Add the sugar and beat until smooth (about 2 minutes). Beat in the vanilla extract. Gently stir in the flour mixture just until incorporated. Flatten the dough into a disk shape, wrap in plastic wrap, and chill the dough for at least an hour.
3. Preheat oven to 350° degrees F with the rack in the middle of the oven. Line two baking sheets with parchment paper.
4. On a lightly floured surface roll out the dough to ¼ inch thick. Cut into rounds or whatever shapes you wish using lightly floured cookie cutter. Place the cookies on the prepared baking sheet and place in the refrigerator for about 15 minutes. This will firm up the dough so the cookies will maintain their shape when baked. Bake for 8 – 10 minutes, or until cookies are lightly brown. Cool on rack. Shortbread with keep in an airtight container for about a week or frozen for several months. This recipe makes about 20 shortbread cookies.


Since I made mine fairly small, I was able to make about 50 cookies, and since I made sandwiches, I was able to make about 21 of those (some of them were too thin/brown/imperfect to pair up, so i left them as is and they are still delish).

Peace. Love. Shortbread.

Sunday, August 22, 2010

XS Strawberry Jammies

YES!
I am back to the world of baking and it feels great! Haha.
As some of you might know, I was on the east coast for 6 weeks dancing my little butt off. And since I was living in a dorm, I was unable to bake the entire time.

It was really weird.
ANYWAY. I'm back in California and finally was able to bake again, so I decided to start off light with some mini cupcakes.
I have wanted to make cupcakes with strawberry buttercream for a while, so since Anna came over and liked the idea, by golly, that's what we did!
We just did a basic white cake for the cupcakes, which we found on Technicolor Kitchen. It was so yummy I could have just eaten a dozen of those little mini cupcakes alone. but I only had one. Haha.
The buttercream is the Sprinkles strawberry buttercream recipe. And oh my goodness, this frosting was everything I hoped the frosting would taste like. I guess a 45 minute wait for a cupcake at Sprinkles is worth it if this is what just one of their frostings tastes like. =]
Anyway, enough about me, here's the recipe:

MINI CUPCAKES:
1 cup milk room temperature
6 egg whites
1 teaspoon almond extract
1 teaspoon vanilla extract
2 ¼ cups cake flour
1 ¾ cup sugar
4 teaspoons baking powder
1 teaspoon salt
3/4 cup butter, softened


1. Preheat oven to350ºF.
2. Line two mini cupcakes tins (each holding 24 cupcakes) with papers.
3. Combine milk, eggs whites and extracts in a small bowl with a fork. Set aside.
4. Combine flour, sugar, baking powder and salt in an electric mixer and mix at slow speed with a paddle attachment
5. Add butter. Continue beating at slow speed until mixture looks like wet sand.
6. Add all but ½ cup of milk mixture and beat at medium speed for 1 ½ minutes. Add remaining milk mixture and beat for an additional 30 seconds, scraping the sides of the bowl if necessary. Do not overmix.
7. Divide batter evenly between prepared pans and gently shake to smooth batter. Bake 10-15 minutes, until toothpick inserted into the center comes out clean.
Let cupcakes cool in the tins for 15 minutes then transfer onto racks to cool completely before frosting.

SPRINKLES STRAWBERRY BUTTERCREAM:
1/2 cup whole frozen strawberries, thawed*
1 cup (2 sticks) unsalted butter, firm and slightly cold
Pinch of coarse salt
3 1/2 cups confectioners' sugar, sifted
1/2 teaspoon pure vanilla extract

Place strawberries in the bowl of a small food processor; process until pureed. In the bowl of an electric mixer fitted with the paddle attachment, beat together butter and salt on medium speed until light and fluffy. Reduce mixer speed and slowly add confectioners' sugar; beat until well combined. Add vanilla and 3 tablespoons strawberry puree (save any remaining strawberry puree for another use); mix until just blended. Do not overmix or frosting will incorporate too much air. Frosting consistency should be dense and creamy, like ice cream.


*Since they are in season, we used fresh strawberries instead of frozen. We only needed about 5 strawberries, so we just snacked on the rest while frosting. It was wonderful.

Earlier in the day on our travels around town, Anna and I stopped into the AMAZING kitchen store, Someone's in the Kitchen. I swear to god, I want to buy everything in that store. But I'm kinda broke, so I cant. But I did find a frosting pump for frosting cupcakes, and it is a lot easier to use than the bags, so i bought it for a good $7. I'm happy. =]
We did some experimenting, and some of it wasn't very pretty, but in the end we figured out how to make perfect frosting swirls. It was great. So here are the results:


^^the fail plate


^^cupcake perfection!

Anyhow, I plan on doing a lot of baking during this last week of summer, so be on the edge of your seats waiting for my next post. (I know you will be ;])

Peace. Love. Minicupcakes.

Monday, June 21, 2010

It feels like summer

GAHH!
As of I am leaving for New York on my dad's birthday, and my mom's birthday is today, yesterday we had a Father's Day/Double Birthday celebration extravaganza.
Usually we make my dad a key lime pie for his birthday every year, but this year I wanted to make him cupcakes.
I saw this recipe on Martha Stewart's website a while ago, and have wanted to try it ever since, so i thought this was the perfect occasion.
Of course, I really wanted to make something for my mom today since it is her birthday, but we have no sugar or eggs or butter, and I have no money to go buy some (not to mention a car or license to get to the store). I'm an awful child. =[

ANYWAY, happier thoughts, here's the cupcakes:

Key Lime Meringue Cupcakes (recipe adapted from Martha Stewart)

CUPCAKES:
3 cups all-purpose flour
1 tablespoon baking powder
1/2 teaspoon salt
1 cup (2 sticks) unsalted butter, room temperature
2 cups sugar
4 large eggs, room temperature
Finely grated zest of 3 limes (about 3 tablespoons), plus 2 tablespoons fresh key lime juice
1 teaspoon pure vanilla extract
1 cup buttermilk


1. Preheat oven to 325 degrees. Line standard muffin tins with paper liners. Whisk together flour, baking powder, and salt.
2. With an electric mixer on medium-high speed, cream butter and sugar until pale and fluffy. Add eggs, one at a time, beating until each is until incorporated, scraping down sides of bowl as needed. Beat in zest and vanilla. Add flour mixture in three batches, alternating with two additions of buttermilk and lime juice, and beating until just combined after each.
3. Divide batter evenly among lined cups, filling each three-quarters full. Bake, rotating tins halfway through, until golden brown and a cake tester inserted in centers comes out clean, about 25 minutes. Transfer tins to wire racks to cool completely before removing cupcakes. Cupcakes can be stored overnight at room temperature, or frozen up to 2 months, in airtight containers.
4. To finish, spread 1 tablespoon lime curd onto middle of each cupcake. Generously dollop on 7 minute frosting on top. Hold a small kitchen torch 3 to 4 inches from surface of frosting, and wave it back and forth until frosting is lightly browned all over. Serve immediately.


KEY LIME CURD:
8 large egg yolks
Finely grated zest of 2 limes
1/2 cup plus 2 tablespoons freshly squeezed key lime juice (about 3 limes)
1 cup sugar
1/8 teaspoon salt
(8 tablespoons) unsalted butter, cold, cut into pieces

1. Combine yolks, lemon zest, lemon juice, and sugar in a heavy-bottom saucepan; whisk to combine. Cook over medium-high heat, stirring constantly with a wooden spoon (be sure to scrape the sides of the pan), until the mixture is thick enough to coat the back of the spoon, 8 to 10 minutes, and registers 160 degrees on an instant-read thermometer.
2. Remove saucepan from heat. Add salt and butter, one piece at a time, stirring until smooth. Strain through a fine sieve into a medium bowl. Cover with plastic wrap, pressing it directly onto the surface of the curd to prevent a skin from forming. Refrigerate until chilled and set, at least 1 hour or up to 1 day.

They were really yummy, but they were definitely an all day project. I still have a butt load left over because the recipe makes 24, so if you want one, come on over to my house. Haha.

Peace. Love. Keylimes.

Sunday, June 13, 2010

LEAPING LEMONS!

Last Wednesday was the Youth Company Picnic (bye bye seniors! *sob sob*) which was hella fun but hella sad at the same time, because we were saying bye to our fabulous seniors.
After moving around an appointment and making some compromises I was able to go, which was really good.
I wanted to bring something lemon-y, because, well, I dont know, but lemons just seem very picnic-y and summer-y. Wow. Thats a lot of -y's. Anyway, I found a recipe for lemon bread/poundcake on Cupcake Rehab and HAD to try it.
And I'm so glad I did, because it came out perfectly. It tasted a lot like the one from Starbucks, as promised, and it was definitely a hit at the picnic.

Here is the recipe:
Lemon Pound Cake (Lemon Loaf)


POUND CAKE:
1 2/3 cups all purpose flour
1/2 teaspoon baking soda
1/2 teaspoon baking powder
3 large eggs
1 cup sugar
2 Tablespoons salted butter, softened
1 teaspoon pure vanilla extract
1 teaspoon pure lemon extract
1/2 cup vegetable oil

1. Preheat oven to 350 degrees.
2. Grease a 9×5 loaf pan well.
3. In a medium bowl mix flour, baking soda, and baking powder.
4. In mixing bowl or stand mixer, cream butter. Add sugar, eggs, vanilla, lemon extract, lemon juice and oil until mixed well.
5. Add dry ingredient mixture to your mixer and blend until smooth. No not over mix.
6. Pour batter into prepared pan and bake for 45-50 minutes or until testing stick comes out clean. Edges should be a dark golden brown and will crisp upon cooling.
7. Let cake cool before icing.


ICING:
1 cup plus 1 teaspoon powdered sugar
2 Tablespoons whole milk
1/2 teaspoon pure lemon extract

For icing blend powdered sugar, milk, and lemon extract until creamy. Ice the top of your cake and let the icing drip down the sides of your pound cake. Let icing set before slicing.

The one thing I will probably change in future times of making this would be the icing - i think there was too much lemon by adding lemon extract to it. Other than that it was perfect though.

PEACE. LOVE. LEMON LOAF.
A week ago I made madeleine cookies for the first time, and i have to say they came out pretty good. WELL. Sorry. Excuse the bad grammar.
Anyway, not much to say about them, so I'll just give the recipe:

Almond Madeleine Cookies Drizzled With Chocolate
(adapted from Technicolor Kitchen


COOKIES:
2 large eggs
1/3 cup sugar
1/4 teaspoon salt
1/2 teaspoon vanilla extract
1/4 teaspoon almond extract
1⁄3 cup all-purpose flour, sifted twice after measuring
3 tablespoons almond meal (or finely ground almonds)
4 tablespoons unsalted butter, melted and cooled


1. Preheat oven to 375ºF. Generously butter and flour 12 molds in a madeleine pan.
2. In the bowl of a standing mixer, combine eggs, sugar and salt. Beat on medium speed until pale, thick and fluffy, about 4-5 minutes. Mix in vanilla and almond extracts.
3. On low speed, mix in the sifted flour and almond meal until just incorporated. Using a rubber spatula, gently fold in the melted butter until blended.
4. Fill each mold almost completely full. Bake the madeleines until the tops spring back when lightly touched, 10 to 12 minutes.
Cool in pan for 2 minutes. Remove madeleines from pan and allow them cool completely on cooling rack.


CHOCOLATE TOPPING:
1 cup semisweet chocolate chips
1 tbsp. butter

1. Put a saucepan on stove on medium heat.
2. Put chocolate chips and butter into pan to melt, stirring constantly. Once everything is completely melted, remove from heat.
3. Pour, drip, drizzle, do whatever you please with it on the madeleines. The possibilities are endless.

I'm definitely going to experiment more with madeleines in the future. They're so good and so simple its crazy!

Peace. Love. Madeleines.

Thursday, June 3, 2010

When you get the urge to bake, well, you gotta bake.
And that is what I did tonight.
My mom bought me these mini peanut butter cups from Trader Joe's, and oh god they are so good. I love love love peanut butter and chocolate, and together, jeez, there are few things that can top that.
Also, because of that, these are very, VERY dangerous things to have around my house, because I can and WILL eat them until they are gone. So I made cookies with them. There are still a lot left, but that cut the amount down by a lot.
I adapted a recipe from the Joy of Baking. It was a chocolate chip cookie recipe, but I just made the dough without the chocolate chips, scooped it out, and then placed 2-4 peanut butter cups on top and baked them like that. I kinda figured that since the peanut butter cups were a little more dense than your average chocolate chip, you wouldn't need as many. So anyway, I'll stop my rambling and give you the recipe.

Peanut Butter Cup Cookies (adapted from the Joy of Baking's Chocolate Chip Cookies)

COOKIES:
2 sticks unsalted butter, room temperature
3/4 cup granulated white sugar
3/4 cup firmly packed light brown sugar
2 large eggs
1 1/2 teaspoons pure vanilla extract
2 1/4 cups all-purpose flour
1 teaspoon baking soda
1/2 teaspoon salt
A lot of (aka I'm not sure how many) mini peanut butter cups

1. Preheat oven to 375 degrees F with rack in center of oven. Line two baking sheets with parchment paper.
2. In the bowl of your electric mixer (or with a hand mixer), beat the butter until smooth and creamy. Add the white and brown sugars and beat until fluffy (about 2 minutes). Beat in eggs, one at a time, making sure to beat well after each addition. Add the vanilla and beat until incorporated. Scrape down the sides of the bowl as needed.
3. In a separate bowl, combine flour, baking soda, and salt. Add the dry ingredients to the egg mixture and beat until incorporated. If you find the dough very soft, cover and refrigerate until firm (about 30 minutes).
4. With two spoons, drop about 1 tablespoons of dough onto the prepared baking sheets. Place 2 - 4 cups on each blob of dough. Bake about 10 - 14 minutes, or until golden brown around the edges. Cool completely on wire rack.


Okay I do realize that that is not the most amazing picture of them, but they are pretty freakin good and I'm tired and lacking any sense of creativity.


*NOTE: I am eating one right now and I kinda decided that I am going to double the amount of salt next time because the contrast of the peanut butter with the actual cookie is a little off. They're still pretty good, but they could be a little saltier.

Peace. Love. Peanutbutter.

Are Those Deep Fried Cupcakes?

On Sunday I went to a barbecue at my good friend Katie's house, and my mommy made an angel food cake for dessert.
Good, sweet, creator of all that is good in the world, let me just tell you that angel food cake is one of my absolute favorite kinds of cakes - scratch that - desserts, in the world. I have two big slices of that baby and could have had two more. And THAT is why my love handles will not go away.
Anyway, on the ride home, I asked my mom if it would be possible to make angel food cupcakes. She told me she didn't think so, because you have to put the cake upside down and all that jazz. So I did my research and looked in my cupcake book, by Elinor Klivans, and I found a recipe for lemon angel food cakes.
I changed it a little and took out the lemon zest so they could just be plain angel food cakes.
So here is the adapted recipe:

CUPCAKES:
1 Cup all purpose flour
1 1/2 Cup sugar (plus 4 Tbsp.)
1 1/2 Cup egg whites
1 Tsp. cream of tartar
1/4 Tsp. salt
1 Tsp. vanilla extract
1/2 Tsp. almond extract


1. Preheat oven to 325. Have ready a muffin pan with 24 muffin cups (or 2 with 12 cups). Put paper liners in 6 of the cups to protect the pan.
2. Sift the flour and 4 tablespoons of the sugar into a small bowl and set aside.
3. In a large bowl, using an electric mixer on medium speed, beat the egg whites, cream of tartar, and salt until the whites are foamy and the cream of tartar dissolves. Beat on high speed until the egg whites look shiny and smooth and the beaters form lines in the mixture; if you stop the mixer and lift up the beaters, the whites should cling to the beaters. Slowly, beat in the remaining 1 1/2 cups sugar, 2 tablespoons at a time., then beat for 1 minute. Mix in the vanilla and almond extract. Beating on low speed, sprinkle 1/4 of the flour mixture over the egg white mixture at a time, beating after each addition to incorporate it.
4. Using about 1/2 cup for each, spoon the batter into the 18 unlined muffin cups. The batter may even be above the tops of the cups, but this stiff batter will not spill over the sides. do not smooth the tops - let the batter remain in fluffy mounds.
5. Bake for about 35 minutes, until the tops are golden and a toothpick inserted in the center comes out dry. The cupcakes will rise quite a bit.
6. Use a small knife to loosen the edges of the cupcakes from the pan. Carefully remove the cupcakes from the pan, using the knife to help release them if necessary, and let them sit on a rack.


They came out really good. I definitely think i will make this recipe again.

Monday, May 31, 2010

Black Bottoms Up

My friend Aubrey turned 16 last week, and in celebration, I made her black bottom cupcakes. She had never had them, but she loves a. chocolate and b. cream cheese, so I thought I would give her the best of both worlds.
I used to eat them a lot when I was little ( I would order them at Peet's or Starbucks when my mom would get her latte), but I probably haven't had one since I was 8 or so. So when I was making them the entire time I was paranoid that they wouldn't come out right. But then I had one (I always taste before I give them to my friends), and they tasted exactly how I remembered them.
Here is the recipe, which i adapted from Smitten Kitchen:

FILLING:
8 ounces cream cheese, regular or reduced fat, at room temperature
1/3 cup granulated sugar
1 large egg, at room temperature
2 ounces bittersweet or semisweet chocolate, coarsely chopped

Beat together the cream cheese, granulated sugar, and egg until smooth. Stir in the chopped chocolate pieces. Set aside.


CUPCAKES:
1 1/2 cups all-purpose flour
1 cup firmly packed light brown sugar
5 tablespoons natural unsweetened cocoa powder (not Dutch-process)
1 teaspoon baking soda
1/4 teaspoon salt
1 cup water
1/3 cup unflavored vegetable oil
1 tablespoon white vinegar
1 teaspoon vanilla extract

1. Adjust the rack to the center of the oven and preheat to 350°F. Butter a 12-cup muffin tin, or line the tin with paper muffin cups.
2. In a medium bowl sift together the flour, brown sugar, cocoa powder, baking soda, and salt. In a separate bowl, mix together the water, oil, vinegar, and vanilla.
3. Make a well in the center of the dry ingredients and stir in the wet ingredients, stirring until just smooth. Stir any longer and you will over mix the batter and end up with less-than-tender cupcakes.
4. Divide the batter among the muffin cups. Spoon a few tablespoons of the filling into the center of each cupcake, dividing the filling evenly. This will fill the cups almost completely, which is fine.
5. Bake for 25 minutes, or until the tops are slightly golden brown and the cupcakes feel springy when gently pressed. These moist treats will keep well unrefrigerated for 2 to 3 days if stored in an airtight container. Makes about 12 cupcakes.


Peace. Love. Blackbottoms.

Cookie Cookie Cooooookies!

Kelsey loves cookies. And cookie monster. But now he is veggie monster and I have lost all respect for Sesame Street. And now I am sad. =[
ANYWAYS, I discovered this recipe on Martha Stewart's website (of course!) and decided this is the absolute be-eh-eh-st chocolate chip cookie recipe ever!
I got so many compliments on them, and am definitely adding it to one of my top 10s.
So, without any further ado, here is the recipe:

CHEWY CHOCOLATE CHIP COOKIES:
2 1/4 cups all-purpose flour
1/2 teaspoon baking soda
1 cup (2 sticks) unsalted butter, room temperature
1/2 cup granulated sugar
1 cup packed light-brown sugar
1 teaspoon salt
2 teaspoons pure vanilla extract
2 large eggs
2 cups (about 12 ounces) semisweet and/or milk chocolate chips


1. Preheat oven to 350 degrees. In a small bowl, whisk together the flour and baking soda; set aside. In the bowl of an electric mixer fitted with the paddle attachment, combine the butter with both sugars; beat on medium speed until light and fluffy. Reduce speed to low; add the salt, vanilla, and eggs. Beat until well mixed, about 1 minute. Add flour mixture; mix until just combined. Stir in the chocolate chips.
2. Drop heaping tablespoon-size balls of dough about 2 inches apart on baking sheets lined with parchment paper.
3. Bake until cookies are golden around the edges, but still soft in the center, 8 to 10 minutes. Remove from oven, and let cool on baking sheet 1 to 2 minutes. Transfer to a wire rack, and let cool completely. Store cookies in an airtight container at room temperature up to 1 week. Makes about 3 dozen.

God I'm sexy. Except JUST KIDDING.


Peace. Love. Coooooookies.

Little FYI

I'm sorry I've been a little MIA recently...I have been sick, then lazy, then super busy, then lazy again. So basically i have very little excuse haha. My baaaad.
Anyway, because I have been slacking, I am backed up on posts so there are about to be a buttload of posts coming your way. Just a little advanced warning.

Peace. Love. Laziness.

Sunday, May 16, 2010

Today, i have reached a peak in my baking.
Today, my friend and I not only had a cookie/cupcake day reunion, but we also made RAINBOW EFFING CUPCAKES.

I'm feelin' pretty good about myself right now, not gonna lie.
I thought it was cool when I made homemade funfetti, but gosh this is even cooler!
They taste pretty good, considering the heaps of chemicals the food coloring must have added, but they look even more badass.
we made a whipped cream to top it with, because we didn't want to take away from the epic-ness of the cupcakes. The cupcake recipe is adapted from http://bakingbites.com/, and the whipped cream is from http://www.joyofbaking.com/.

Anyway, without any further ado, I give you... Kelsey and Erica's COSMIC CUPCAKES:


Cosmic Cupcakes (adapted from http://bakingbites.com/ Rainbow Cupcakes with Whipped Cream Topping:

CUPCAKES

2 Cup all purpose flour
3 Tsp. baking powder
1/2 Tsp. salt
1 Cup sugar
4 Large eggs
1 Cup vegetable oil
1 Cup buttermilk
2 Tsp. vanilla extract
red, yellow, green and blue food colorings


1. Preheat oven to 350F. Line cupcake tin with 20 with paper cups.
2. In a medium bowl, whisk together flour, baking powder and salt.
3. In a large bowl, whisk together sugar, eggs, vegetable oil, buttermilk and vanilla extract. Pour in dry ingredients and stir until just combined.
4. Divide batter evenly into 6 small bowls; each should have a little more than 2/3 cup batter (approx 6 tbsp or so for each).
5. Add about 15 tsp food coloring to each bowl to make red, orange, yellow, green blue and purple batters. Stir well, so no streaks of plain batter remain. Add additional food coloring if necessary.
6. Starting with the purple batter, add a small spoonful to each of the 20 muffin cups (just over 1/2 tbsp in each). Repeat with all remaining colors, working from blue to green to yellow to orange to red, adding each subsequent spoonful on top of the previous color. Do not attempt to spread the layers of color out (as it can cause layers to get combined), but allow them to spread on their own.
7. Bake for about 15 minutes, until a toothpick inserted into the center comes out clean. Cool cupcakes on a wire rack before frosting. Makes about 20.
*Note: We doubled this from the original recipe, and it actually only made about 18. Just sayin'.

WHIPPED CREAM:

1 Cup heavy whipping cream
1/2 Tsp. vanilla extract
1 Tbsp. granulated sugar

1. In a large mixing bowl place the whipping cream, vanilla extract, and sugar and stir to combine.
2. Cover and chill the bowl and wire whisk in the refrigerator for at least 30 minutes. When chilled, beat the mixture until stiff peaks form.


(Not the best picture of us, but meh, what can you do?)


Basically, even though my parents declared that the cupcakes "look like the fake food that kindergartners play with", Erica and I decided all our friends are going to love them and that the rainbow just makes them extremely kick ass.

I'm super happy right now. YAY! (Okay, maybe I ate too much of the batter when I was baking...)

Happy Sunday y'all.
Peace. Love. Rainbowcupcakes.

Sunday, May 9, 2010

Suga Mama

First off, I would just like to announce to the world that I love my mommy and appreciate everything she does. ♥
So happy Mother's Day to all the hot mamma's out there.
Every year for Mother's Day my dad and I (and my sister, when she's around) make my mom her favorite things for breakfast: bacon, eggs, and muffins. My dad is in charge of the bacon (and this year the eggs), and I of course made the muffins. =]
Since we have a great meyer lemon tree in our front yard, and I know how much my mom love's lemon, I decided this year to make her lemon poppyseed muffins with a vanilla glaze. I got the recipe from my favorite cupcake book, Cupcakes! by Elinor Klivans.
Okay, truth. They are actually technically "cupcakes", but hell, I like them, my mom likes them, if we want cupcakes for breakfast, by golly we will have cupcakes for breakfast and call them muffins and there is nothing anyone can do about it!


Lemon Poppy Seed Muffins (Cupcakes)
Adapted from Elinor Klivan's book Cupcakes!


CUPCAKES/MUFFINS

1 Cup ubleached all-purpose flour
1/2 Tsp. baking powder
1/2 Tsp. baking soda
1/4 Tsp. salt
1/2 Stick butter
3/4 Cup sugar
2 Large eggs
1 Tsp. vanilla extract
2 Tsp. grated lemon zest
1 Tbsp. poppy seeds
1/2 Cup buttermilk


1. Preheat oven to 350 degrees. Line muffin tin cups with paper cupcake liners.
2. Sift the flour, baking powder, baking soda, and slat into a medium bowl and set aside.
3. In a large bowl , using an electric mixer on medium speed, beat the butter and sugar until smoothly blended and lightened in color, about 1 minute. Add the eggs one at a time, beating until each is blended and the batter looks creamy, about 1 minute. Mix in the vanilla, lemon zest, and poppy seeds.
4. On a low speed, add half the flour mixture, mixing just to incorporate it. Mix in the buttermilk to blend it. Mix in the remaining flour mixture until it is incorporated and the batter looks smooth.
5. Fill each paper liner about 1/4 full (about 3 1/2 Tbsp). Bake just until the tops feel firm, about 18 minutes.
6. Let cool for about 10 minutes. Ice or don't ice as you please. Makes about 12 cupcakes.

Sugar Glaze (the result of my experimenting)

GLAZE:
2-2 1/4 Cups confectioners sugar
3 Tbsp. milk
1/2 Tsp. vanilla extract

Mix all ingredients together. THATS ALL FOLKS!


Happy Mother's Day again, y'all. I'm about to go spend the day with my mommy, give her soap I bought during my only break at ballet yesterday, and watch the movie Babies. Have fun with your mommies too, yo.

Peace. Love. Muffins.